Project Catalyst

In the summer of 2023, I took up a hobby in golfing. I had no background in golf aside from an interest in the fashion. My dad, however, took the time to take me under his wing and teach me. As an avid golfer, my dad had lots of tips and tricks that he had gathered through his many years of golfing, one of them being understanding how precipitation affects the game. He explained that the ball moves differently depending on the wetness of the green, which affects both the short and long game. The ball will "sit" or stick more often when the grass is wet, and roll more freely when the grass is dry and hard. This spurred my idea for this project. I wanted to create a way for novice golfers to be able to understand ball behavior through reading the green's moisture content without relying on amateur intuition.
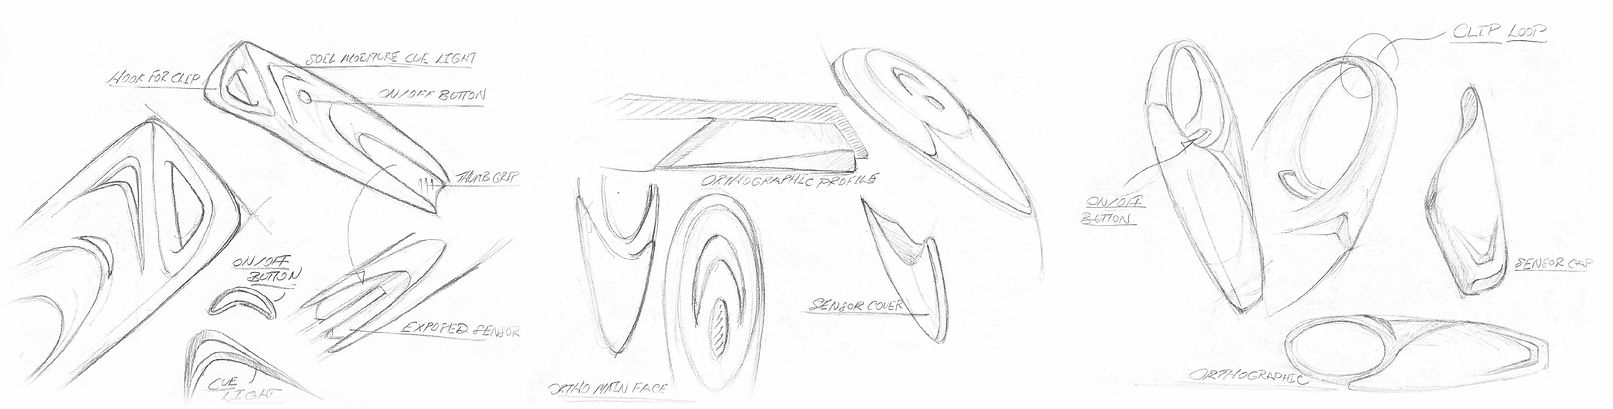
Thumbnail Sketches

Idea Exploration

Foam Sculpting
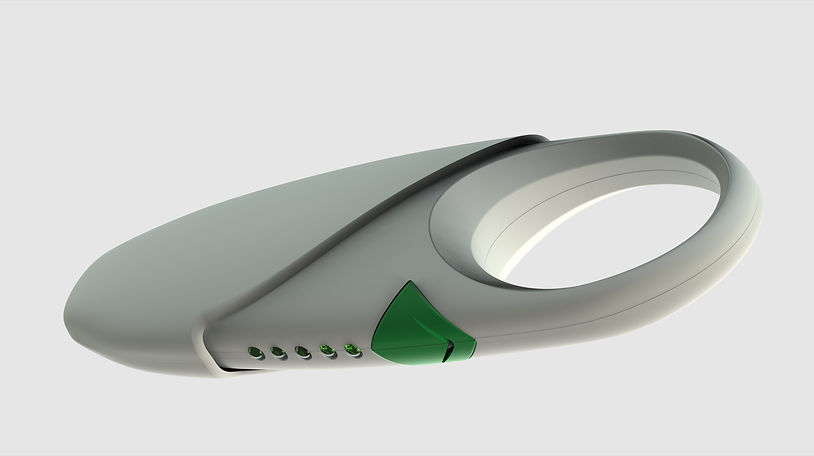
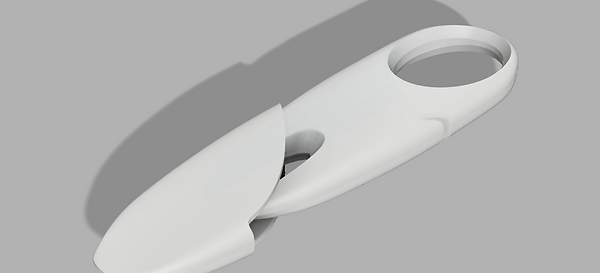
Foam Model


User Interaction Study
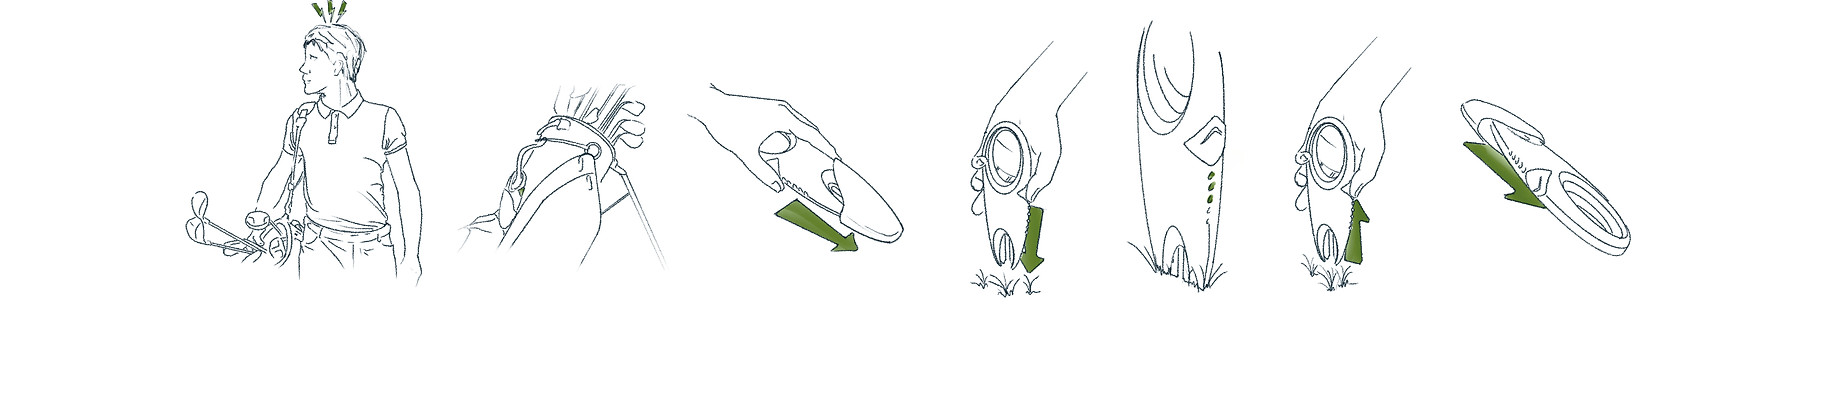
Determine the need for a moisture reading
Remove RollTek device from golf bag
Remove sensor cover
Insert device into ground until sensor teeth are at least 1/2 submerged
Observe moisture 1-5 LED feedback
Remove from ground
Re-cap device and return it to bag


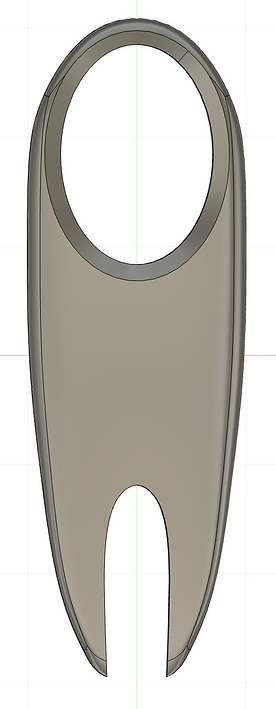

Roughing out CAD

After the 3D foam exploration, I began in CAD with a rough idea of the form I wanted to create, but I knew I wanted a central part line to make the internal assembly as simple as possible.
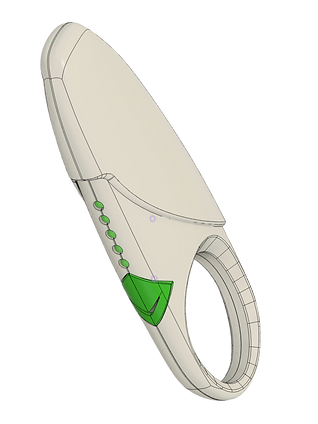
Here I added a sheath cover included in the sketches and refined the surfacing, and added a portion to act as the button that I ended up changing later
Mid-Fidelity CAD


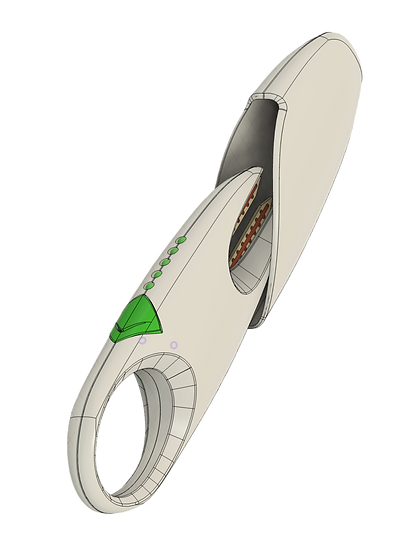
High-Fidelity CAD
Here is the final portion of the CAD stage, where I finished surfacing and adding details like LED and charging ports!


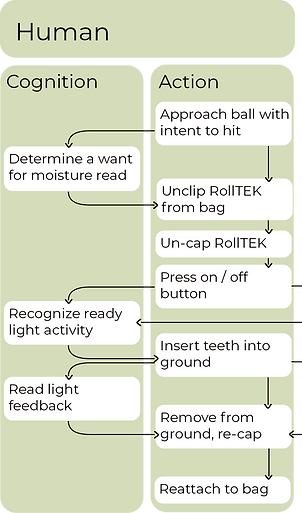
Process Flow Charts

This flow chart acts as a way to walk through how the user and the product interact from an action and cognition standpoint. This flow chart later helped to create the coding by understanding the sequencing of the device's actions.
This flow chart is an expansion on the previous one that is more focused on the operations of the device and how the different components have a relationship.
Flow Chart 1
Flow Chart 2

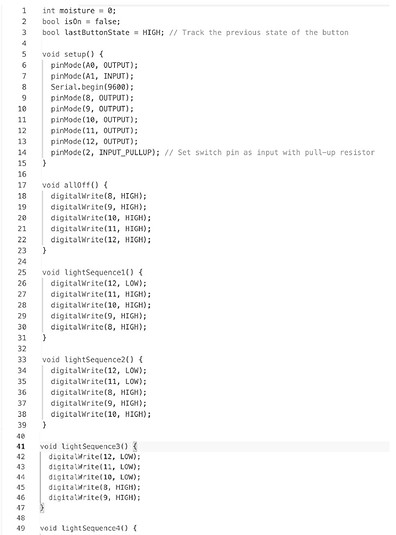
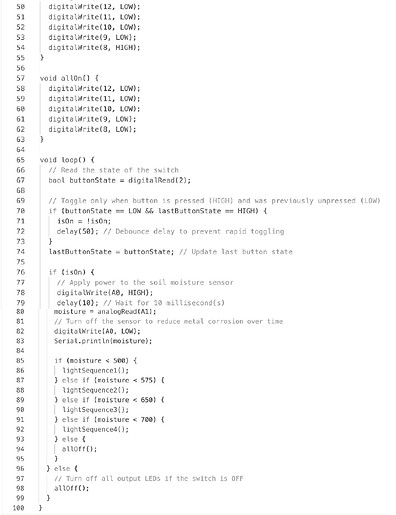
This code combined the tutorials we were given in class with ChatGPT. I was able to get my code to work the way that I wanted it to. It took many iterations and trials to get to a functional code, but I was able to achieve it.
Writing the Code

Assembling the Internals
Following my plan in CAD, I assembled the internals within one body half of the device, and snapped the other half on. I did not use any soldering for this project, just male-female pins or electrical tape.